Polyguard PreScreen: Greenhouse Setup
This guide walks a Greenhouse administrator through everything needed to protect your job applications with a Polyguard Trust Check. Work top to bottom. Each section produces one or two values that you paste into the Polyguard admin console (/admin) as you go. The whole setup takes about 20 minutes.
Before you start
You need a Greenhouse user with permission to manage and configure Dev Center tools (typically a Site Admin). The Dev Center is where API keys and web hooks live, and you'll also edit each job's interview plan.
Keep the Polyguard admin console (https://<your-polyguard-domain>/admin) open in a second tab. You'll paste values into it throughout. Sign in there with the magic link sent to your approved admin email.
Secrets are entered once. API keys and the web hook secret are shown only once in Greenhouse, and the
/adminconsole stores them write-only (it later shows only the last 4 characters). Copy each value into/adminthe moment you create it.
Step 1: Enable verified submissions
This step lets the Polyguard careers site submit verified applications into Greenhouse on the candidate's behalf.
1a. Create a Job Board API key
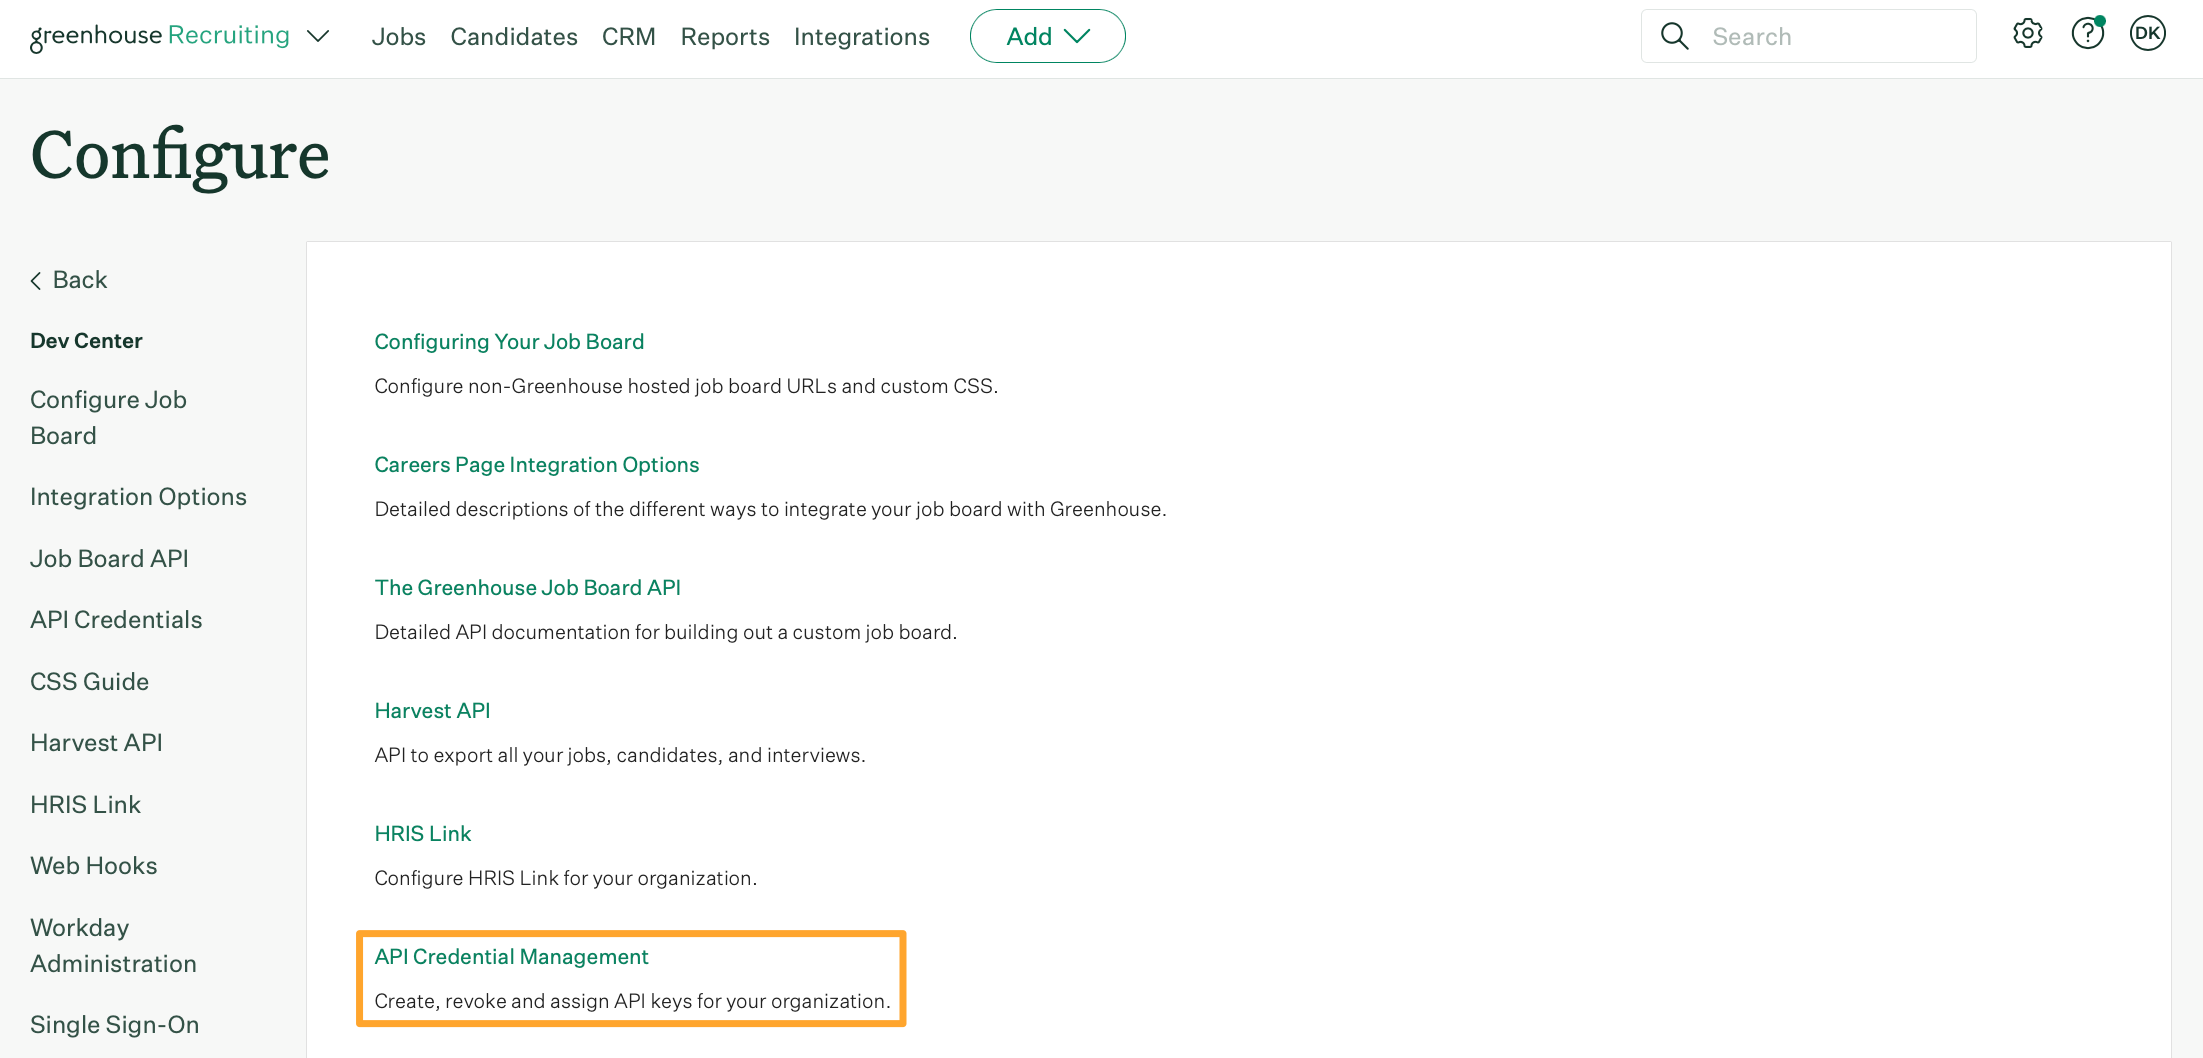
- In Greenhouse, click the Configure (⚙️) icon in the top navigation bar.
-
In the left sidebar, open Dev Center, then click API Credential Management.
-
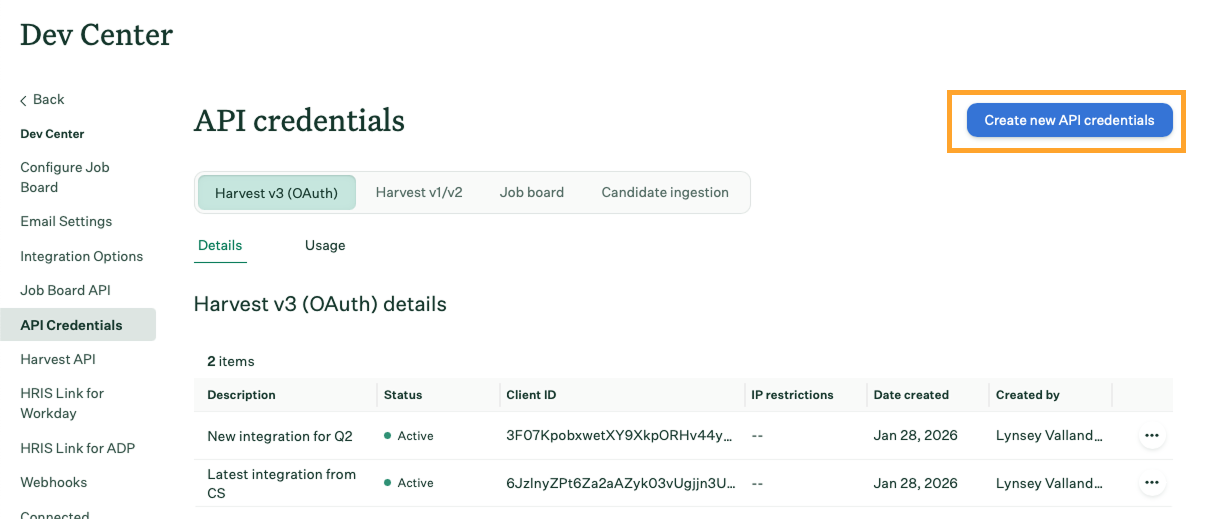
Click Create new API credentials (top right).
-
In the dialog:
- API Type: select Job Board.
- Partner: choose Unlisted vendor (or Custom).
- Description:
Polyguard: Job Board.
- Click Manage permissions / Create. Greenhouse assigns the Job Board permissions automatically.
- Click Copy to copy the key, then paste it into the Job Board API key field in
/admin. In Greenhouse, click I have stored the API Key.
⚠️ The full key is shown once. Copy it before confirming; if you lose it you'll have to create a new one.
If you leave the Job Board API key blank, the careers site runs in demo mode: it shows exactly what it would submit without actually posting to Greenhouse. This is useful for a dry run before the key is in place.
1b. Add a custom field for the Polyguard verification token
When a candidate passes a Trust Check, Polyguard records a verification token on their application. Storing it in a dedicated custom application field keeps it reportable and consistent across every job. It's one org-wide field, created once. See Greenhouse's Create a new custom application field:
- Go to Configure (⚙️) → Custom Options → Application (Custom Application Fields).
- Click Add Field. Name it
Polyguard Verification Token, field type Single-line text. Save it. - Open the field again and note its field key, which Greenhouse generates from the name (e.g.
polyguard_verification_token). Paste it into the Polyguard field key box in/admin.
Step 2: Add the Trust Check stage
Every application, whether it comes through the Polyguard careers site or directly into Greenhouse, lands in this stage first. Verified candidates are advanced out of it automatically; unverified ones are held here until they pass an emailed Trust Check. This step creates that stage and tells Polyguard which user to attribute stage moves to.
2a. Add a stage for Polyguard Trust Checks
- Open a job → Job Setup, then select Interview Plan in the left panel.
- Click Add stage, choose Create a custom stage, and name it exactly
Human Verification. - Make it the first stage, before any human-review stage, so every application lands here. Polyguard advances each candidate to the next stage automatically once verified.
- Enter that exact stage name in the Gate stage name field in
/admin(matching is case-insensitive, but spell it identically).
The stage must exist, with the same name, as the first stage in every job you want protected.
2b. Add the stage to your existing open jobs
Step 2a adds the stage to a single job, but it must be the first stage in every job you want protected, including openings that are already live. Rather than editing each job by hand, use Greenhouse's bulk stage editing to roll the Human Verification stage out across your open jobs. Follow Edit job stage in bulk, and confirm the stage lands first in each job's interview plan.
2c. Record a system user's ID for stage-move actions
Greenhouse attributes every stage move to a real user. Pick a user to act on Polyguard's behalf (ideally a dedicated service or recruiting-ops account with permission to move applications) and record their numeric ID.
- Go to Configure (⚙️) → Users.
- Click the user you want stage moves attributed to. This opens their Edit User page.
- Read the numeric ID from the page's URL. For example, in
https://app.greenhouse.io/account/user/12345, the user ID is12345. - Paste that ID into the On-behalf-of user id field in
/admin.
Step 3: Connect the submission web hook
Greenhouse sends a web hook when any application is submitted. Polyguard records the verification token on the custom field and advances the application out of the gate stage: a hosted apply advances on arrival; a direct apply advances after the candidate passes an emailed Trust Check. This step needs a Harvest API key (to read stages and move applications) and the web hook itself.
3a. Create a Harvest (v1/v2) API key
- Return to Configure (⚙️) → Dev Center → API Credential Management and click Create new API credentials.
- In the dialog:
- API Type: select Harvest. This is the key-based v1/v2 credential (HTTP Basic auth) that Polyguard uses. Do not create a Harvest V3 (OAuth) credential; it isn't supported yet.
- Partner: choose Unlisted vendor (or Custom).
- Description:
Polyguard: Harvest.
- Click Manage permissions. Enable only the endpoints Polyguard uses (least privilege; leave everything else unchecked):
- Job Stages → Get: Retrieve Job Stages for Job
- Applications → Patch / Move: Move Application
- Click Save, then Copy the key and paste it into the Harvest API key field in
/admin.
⚠️ Like the Job Board key, the Harvest key is shown once.
📷 Reference for the permissions checklist: https://support.greenhouse.io/hc/en-us/articles/115000521723-Manage-Harvest-API-credentials-permissions
3b. Set up the Harvest web hook
Greenhouse calls Polyguard whenever a candidate submits an application, so direct applies can be gated.
First, get your web hook URL. Open the Polyguard /admin console; it displays the exact endpoint URL to use, already scoped to your job board, in the form:
https://<your-polyguard-domain>/api/greenhouse/webhook/<your-board-token>
Copy that URL, then in Greenhouse:
- Go to Configure (⚙️) → Dev Center → Web Hooks.
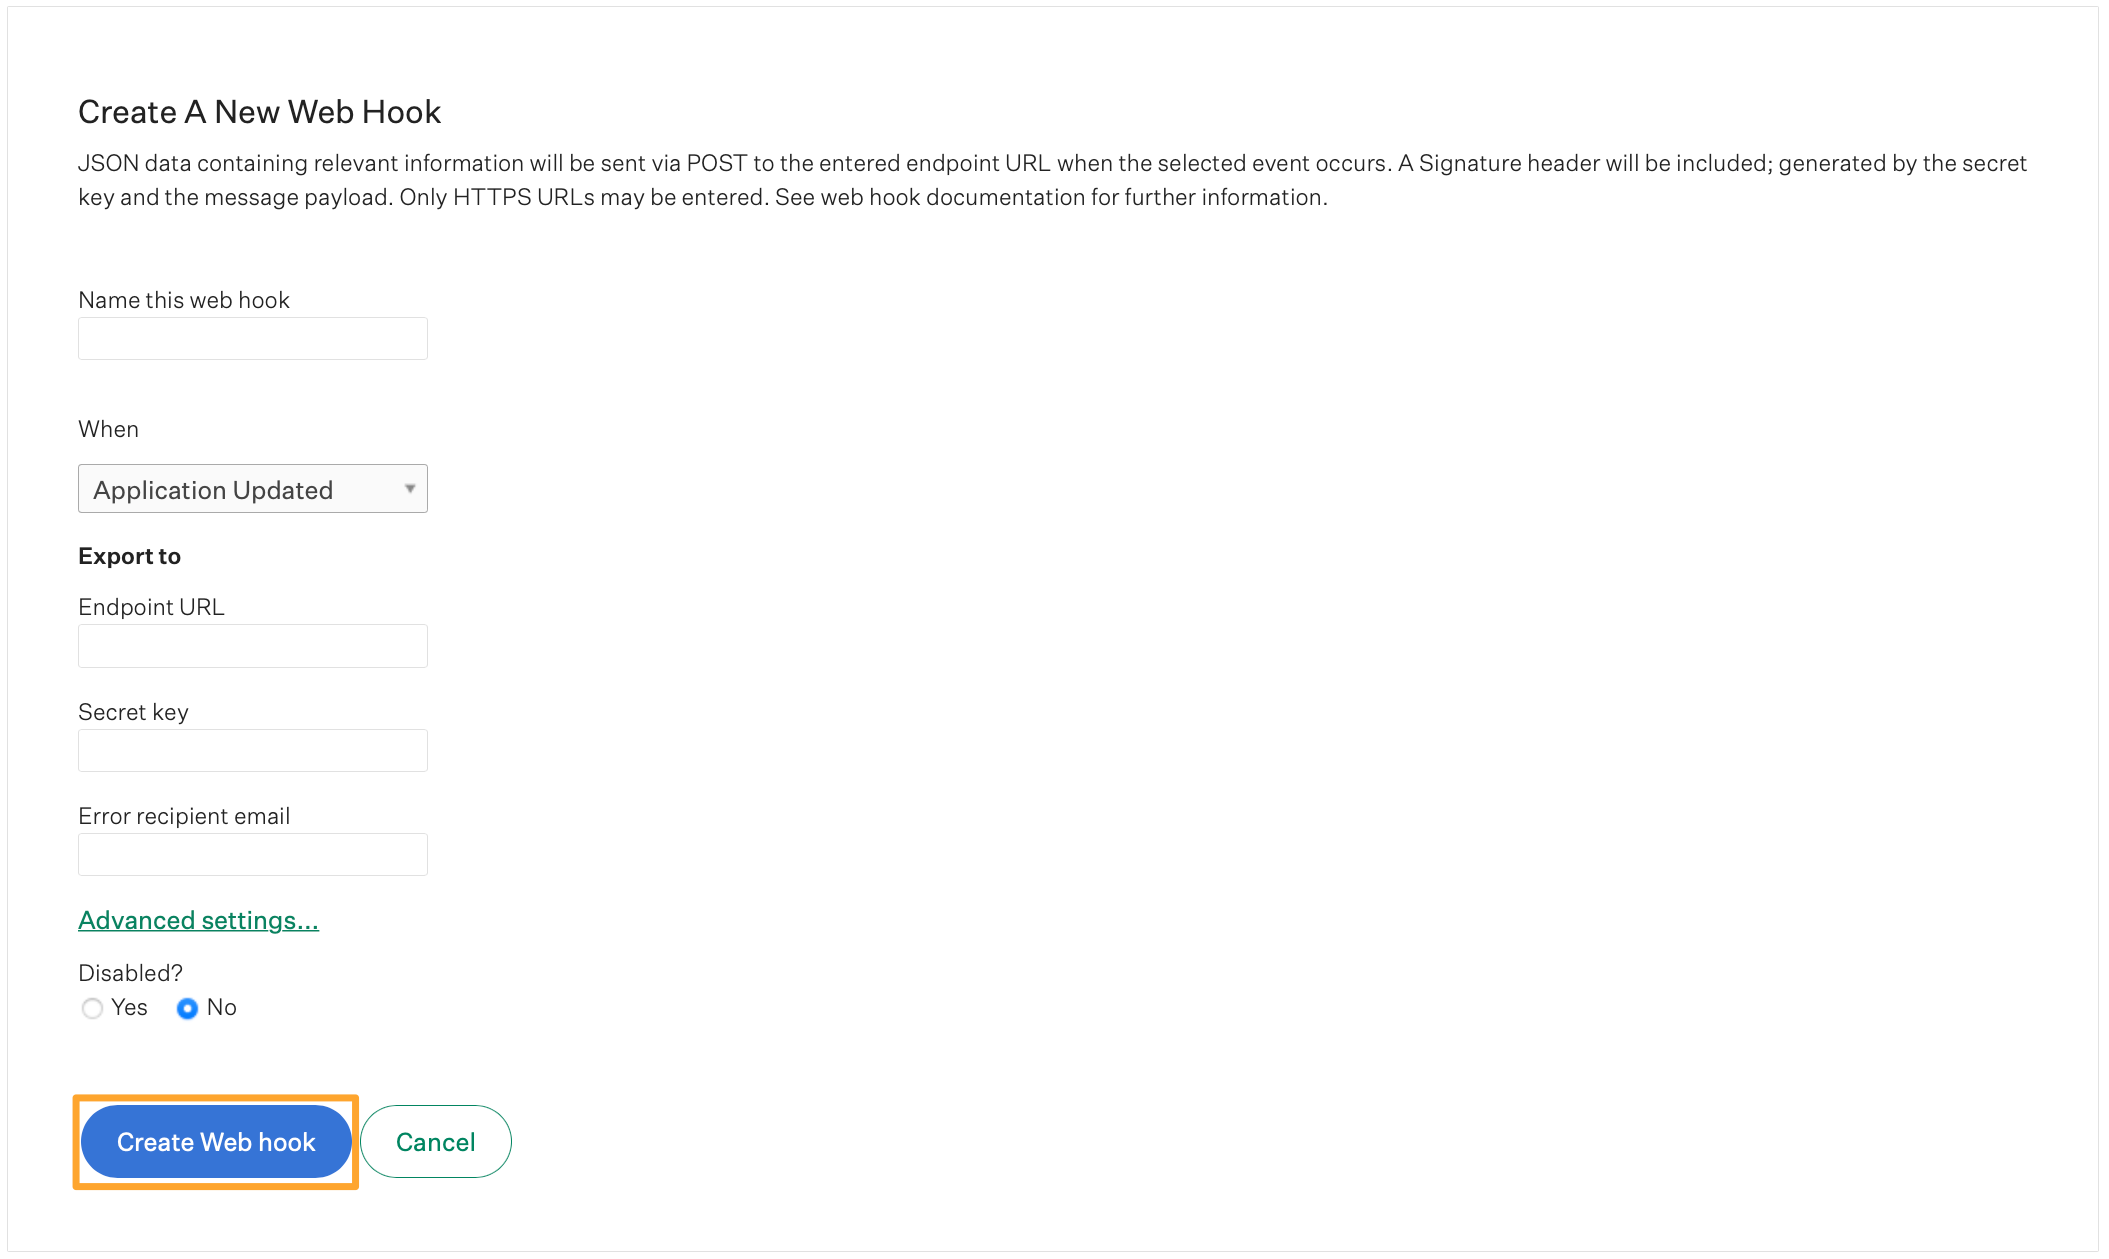
- Name this web hook:
Polyguard: Candidate submitted application. - When: select Candidate has submitted application.
- Endpoint URL: paste the URL from
/admin(must behttps). - Secret key: in the Polyguard
/adminconsole, click Generate next to Harvest web hook secret to create one, copy it, and paste it here. The value must be identical in both places. - Error Recipient Email: enter
[email protected]so Polyguard is alerted if web hook deliveries start failing. -
Leave Disabled? set to No and click Create Web hook.
📷 Reference for the web hook form and signature details: https://support.greenhouse.io/hc/en-us/articles/360005574531-Create-a-webhook and https://developers.greenhouse.io/webhooks.html
Step 4: Save everything in /admin
By now you should have pasted each value into /admin as you created it. Do a final pass to confirm nothing is missing, then click Save changes.
/admin field | Set in | Notes |
|---|---|---|
| Job Board API key | 1a | Submits verified applications. Write-only after save. |
| Polyguard field key | 1b | The custom field's key (e.g. polyguard_verification_token); where the token is recorded for every application. |
| Gate stage name | 2a | Must match the first-stage name in every protected job. |
| On-behalf-of user id | 2c | Numeric ID from the Edit-User URL. |
| Harvest API key | 3a | Reads stages, moves applications. Write-only after save. |
| Harvest web hook secret | 3b | Must match the secret entered in Greenhouse. |
Step 5: Verify it works
- Listings: your Polyguard careers home page shows your live Greenhouse jobs. (Confirms your board is connected.)
- Verified submission: submit a test application through the Polyguard careers site. With a Job Board key, confirm it appears in Greenhouse, advances out of Human Verification automatically, and the Polyguard Verification Token field is populated.
- Direct apply: create a test application directly in a protected job and confirm it lands in Human Verification, the candidate receives a Trust Check email, and the application advances once they pass.
If a web hook test doesn't fire, the most common cause is the wrong When event. Re-check that it's set to "Candidate has submitted application" (step 3b).
Reference: Greenhouse documentation
- Create a job board API key for an integration
- Create Harvest API credentials for an integration
- Manage Harvest API credentials permissions
- Create a new custom application field
- Interview plan overview
- Find your Greenhouse Recruiting user ID
- Create a webhook
- Recruiting Webhooks (signature & events)
- Harvest API
- Job Board API