Polyguard PreScreen for Lever
| Product | Polyguard PreScreen |
| ATS | Lever (Postings API + Data API v1) |
| Console | console.polyguard.ai |
| Setup time | approximately 20 minutes |
| Contact | [email protected] |
1. Overview
PreScreen protects each job application with a Polyguard Trust Check: a short check the candidate completes on their phone. Unverified candidates are held in the default new applicant stage, and verified ones are advanced automatically. The verification details are recorded as a note on the opportunity.
How it works
Applications reach Lever by two paths:
| Where the candidate applies | How the check is presented | |
|---|---|---|
| Job Board | Your Polyguard careers site at https://<your-polyguard-domain> (or embedded on your own careers page) | The Trust Check appears when the candidate clicks "Submit" |
| Direct apply | Lever itself, via your Lever-hosted job site, LinkedIn, Indeed, or a referral | Lever notifies Polyguard, which emails the candidate a Trust Check |
The job board is a wrapper around your Lever configuration, rendering your live Lever postings with their full application forms.
What you will configure
- A PreScreen app in the Polyguard Console, with its own hostname
- One Lever API key with a fixed set of permissions
- A
Human Verificationstage in your pipeline - An Application created webhook from Lever to Polyguard
Who does what
Steps marked (Polyguard) will be performed by a Polyguard staff member. Lever steps need a Lever Super Admin: only Super Admins can generate API credentials and configure webhooks.
2. Prerequisites
| Requirement | Details |
|---|---|
| Lever access | A Super Admin |
| Polyguard account | Console access at console.polyguard.ai with the admin role |
| Lever site slug | The {site} in https://jobs.lever.co/{site} (<your-lever-site>) |
| Brand assets | Logo, exact brand colors, and the company display name for the careers site |
Secrets are shown once
Lever displays an API key exactly once, and the Polyguard Console stores it write-only, showing only the last 4 characters afterwards. Copy each value into the Console the moment you create it.
3. Collect your Lever values
Find these values under Settings in Lever. Keep the values to hand; you will paste them into the Console in Section 4.
3a. Lever API key
The key should be configured with the following endpoint permissions. Allow access to confidential data can be left off.
| Read endpoints | Write endpoints |
|---|---|
| read posting | apply to posting |
| read posting apply form | create opportunity note |
| read opportunity | update opportunity stage |
| read opportunity application | update opportunity archived state |
| read stage | |
| read archive reason | |
| read diversity survey |
- Open Settings → Integrations and API → API Credentials.
- Under Lever API credentials (not the Postings API key at the top of the page), click Generate New Key.
- Name the key
Polyguard PreScreen. The name and an optional logo appear on the notes and stage changes Polyguard writes. - Under Permissions, tick the endpoints in the table above.
- Click Generate key, then Copy Key. This is the only time Lever shows it.
3b. Site slug
The {site} in your Lever-hosted job site URL, https://jobs.lever.co/{site}. For your account this is <your-lever-site>.
3c. The Human Verification stage
Lever pipeline stages are shared across all postings. Teams whose applicants land in, or should advance into, a different stage can be listed under Pipeline stages by team on the Candidate verification card of the PreScreen settings page.
- Open Settings → Pipeline and archive reasons.
- Add a stage named Human Verification directly after the stage new applicants land in (by default New applicant).
Candidates who pass a Trust Check are moved into it; unverified candidates stay in the landing stage.
3d. Perform-as user (optional)
Stage moves and notes are attributed to the API key by default. To attribute them to a Lever user instead (for example a shared recruiting-ops account), open that user in Lever and copy the id from the URL.
3e. Archive reason (optional)
When an emailed Trust Check is not completed within 7 days, Polyguard revokes the link. If you also want the candidate archived, pick an archive reason under Settings → Pipeline and archive reasons and note its id. Leave this out to keep unverified candidates held in the landing stage.
4. Configure the app in Polyguard
4a. Create the PreScreen app (Polyguard)
Console → Create App → app type PreScreen.
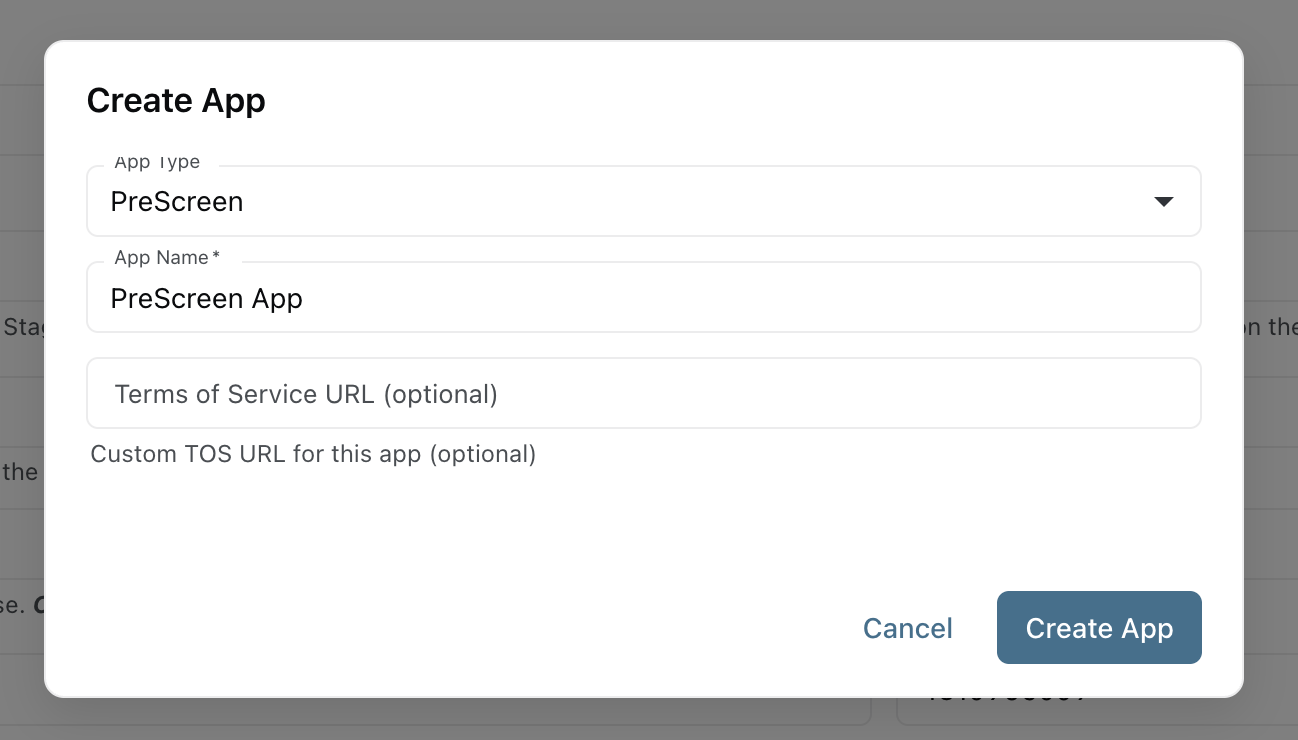
Creating it reserves a hostname of the form {account-slug}.prescreen.polyguard.ai.
4b. Check the hostname (Polyguard to change)
Settings → Prescreen → Hostnames shows the host this tenant is served on. Account admins can read it; only Polyguard staff can change it.
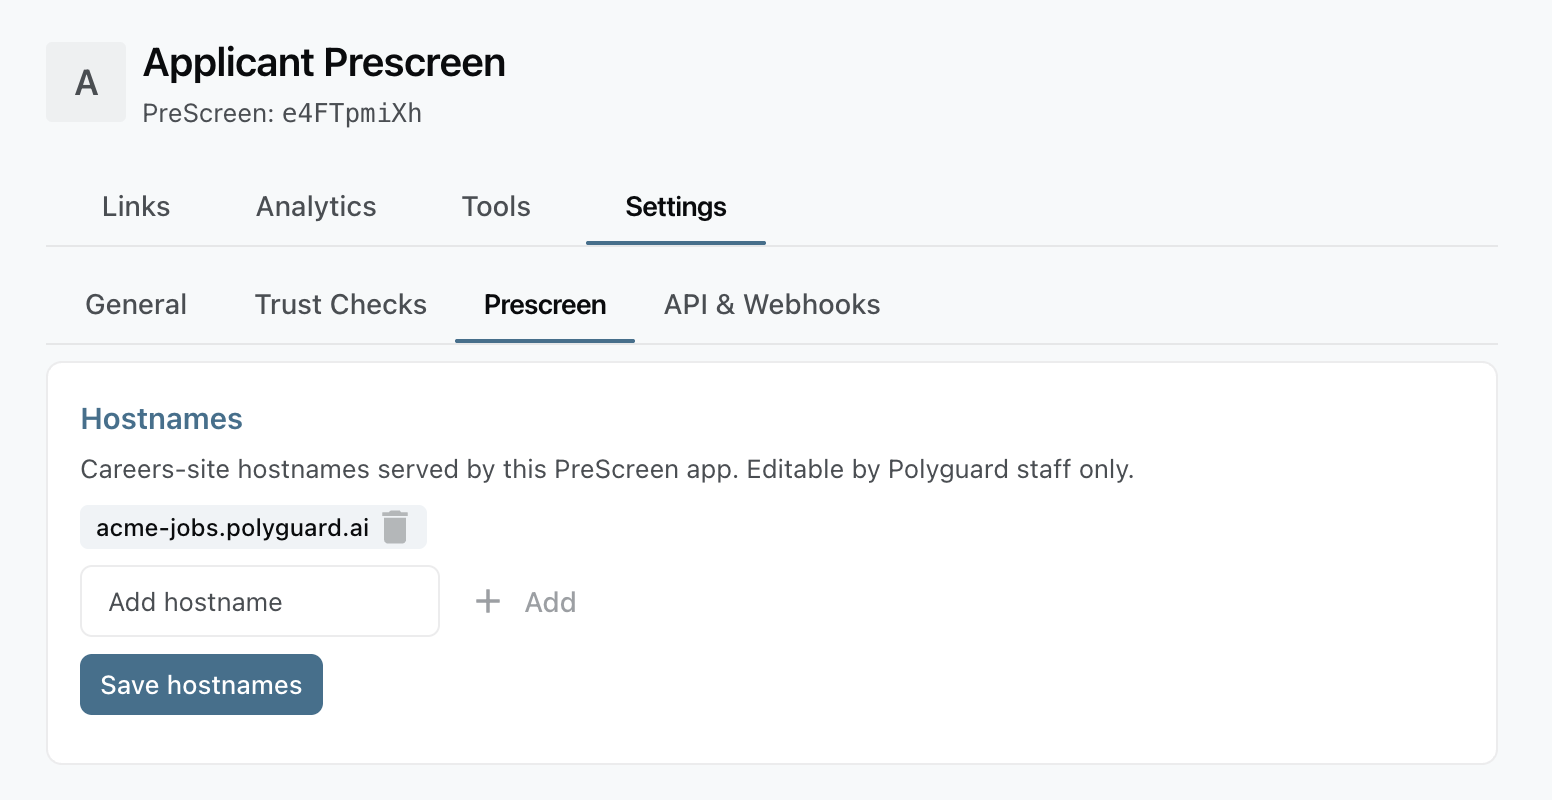
The webhook URL in Section 5 is built from it, and so is the address Polyguard delivers verification results to.
4c. ATS connection
Settings → Prescreen → ATS connection, provider Lever.
| Field | Value | From |
|---|---|---|
| Lever site | your site slug, <your-lever-site> | 3b |
| Data residency (us | eu) | us unless your Lever account is on api.eu.lever.co | |
| Lever Data API key | the key generated in 3a | 3a |
| Live submit (1 = on) | leave blank for a demo run (the success screen shows what would be sent to Lever); set to 1 to create applications | |
| Webhook signing token | copied from Lever in Section 5 | |
| Perform-as user id | optional | 3d |
| Initial (landing) stage name | New applicant, or your landing stage's exact name | 3c |
| Gate stage name | Human Verification | 3c |
| Archive reason id (expiry) | optional | 3e |
| Company name (Trust Check email) | optional display name in the emailed Trust Check |
Click Save ATS configuration. Secrets clear from the form on save and show their last 4 characters afterwards; leaving a secret blank keeps the stored value rather than clearing it.
4d. Branding
Settings → Prescreen → Branding: company name, colors, logo, favicon and theme stylesheet, plus the careers title and intro shown above the roles list. Optional extras on the same card: your site navigation and header button, the roles list layout (department tabs) with a notice and call to action. Changes reach the careers site within a minute.
5. Register the webhook in Lever
Lever notifies Polyguard whenever an application is created.
5a. The webhook URL
https://<your-polyguard-domain>/api/ats/webhook. The Console shows it in the ATS connection form above Webhook signing token once a hostname is saved; use it verbatim.
5b. Create the webhook
- In Lever, open Settings → Integrations and API → Webhooks.
- Toggle Application created on and click Add webhook.
- Enter the URL from 5a.
- Copy the Signature token Lever shows for this webhook.
- Click Verify connection. Lever sends a sample event and reports success. If it fails because the Polyguard site is not yet live at the hostname, Lever still delivers real events once it is.
5c. Save the signing token in the Console
Back in Settings → Prescreen → ATS connection, paste the token into Webhook signing token and click Save ATS configuration.
6. Support
- Email: [email protected]
- Console: console.polyguard.ai
- Sending Trust Check emails from your own domain: Sending From Your Domain
Lever documentation
- Lever API reference
- Generating and using API credentials
- Webhooks: set up, signing and delivery history
For Lever platform issues unrelated to Polyguard, contact your Lever administrator or Lever Support.